
Garage Golf: How (& why) I Built a Home Golf Simulator
The end of the year is a fickle time for me. On one hand, it means the holidays are here and I get to take some time off from work and hang out with the family. On the other hand, it also means winter is coming and the season is quickly coming to an end (at least for those on the East Coast).
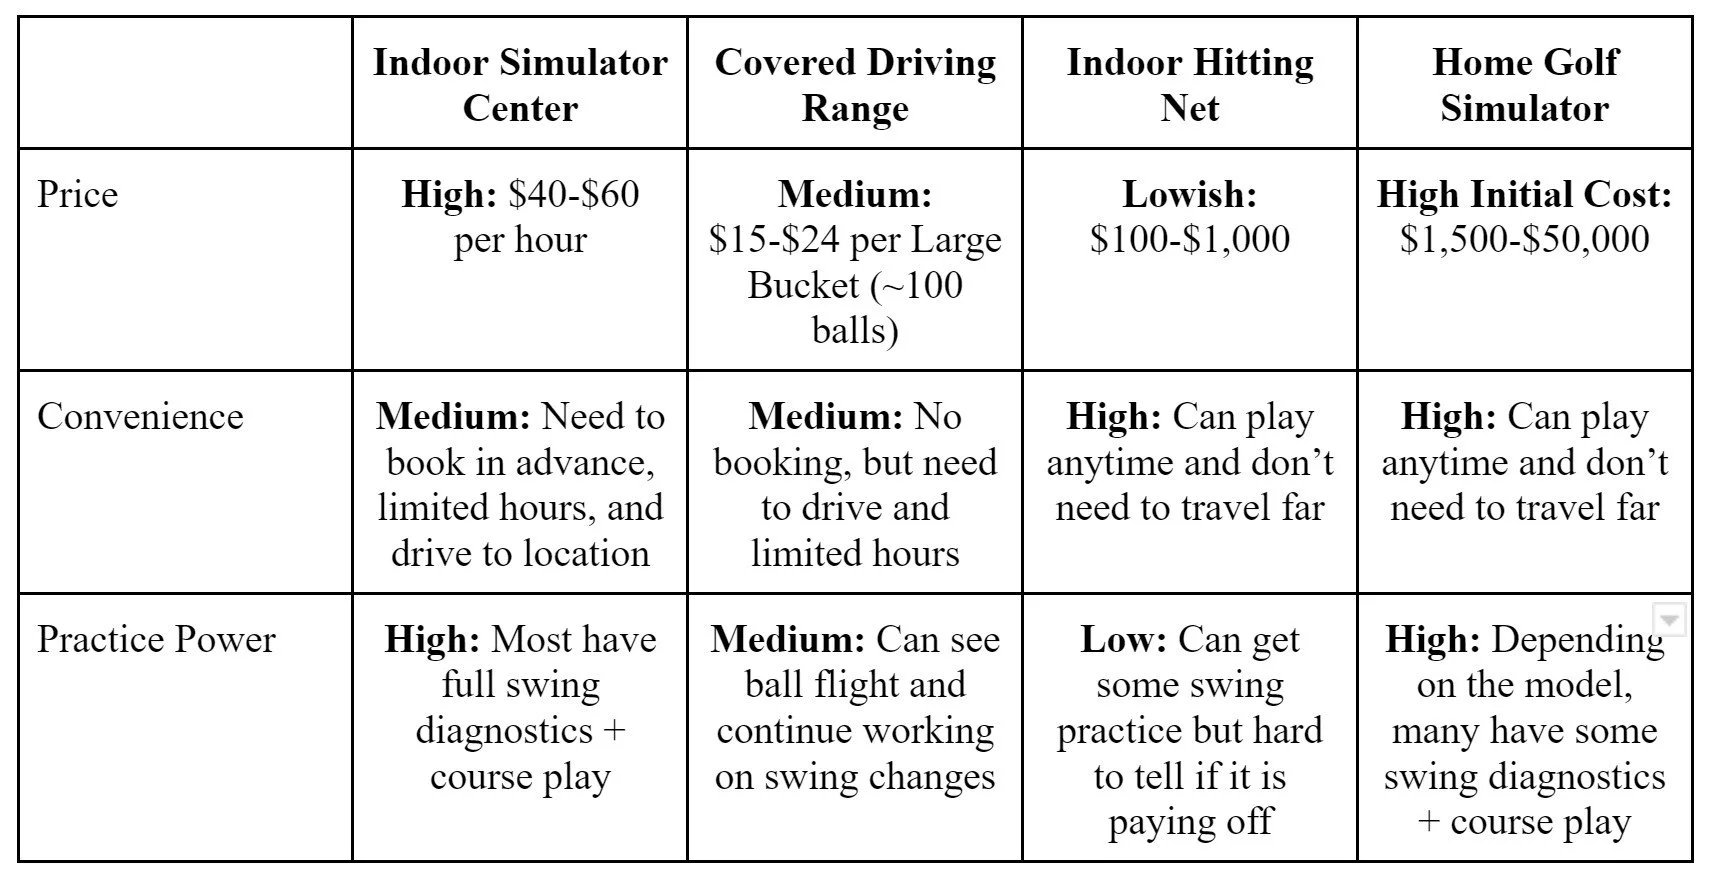
After getting nearly 50 rounds in this season, working on my game with a PGA Pro (Dave Bove), and playing some of my best golf since high school, I didn’t want the winter to set back all the progress I had made this past year. So naturally I started to look into the best ways to keep my golf game in shape; driving ranges that are open throughout the winter, indoor simulator centers, indoor hitting nets, and of course, in-home simulators.
In the end, my decision was based on 3 vectors:
Price
Convenience
Practice Power
One Note: This entire decision making process was predicated on the fact that my family home has a place to house an indoor net/simulator. I recognize that not everyone reading this might have this as an option.
After evaluating the options above and factoring how much I like to play (usually 2-3 times a week), I realized trying to build a home simulator was the clear winner. After pricing out the cost of building one out, I realized the breakeven cost for the build out could be recouped after as little as a month of play (~47 hours at a simulator studio).
Simulator Evaluation: There are a ton of simulators on the market today that have a pretty wide range of prices ($300 - $50,000+). My challenge was to decide what works best for me (note this will likely be different based on person, budget, and space). Ultimately, I went with the FlightScope Mevo+ which offered the best combination of accuracy, data parameters, and course simulation for the price. Attached here (MyGolfSpy & Rain or Shine Golf) are a few of the resources I used as I went through my review process.
Early Reaction
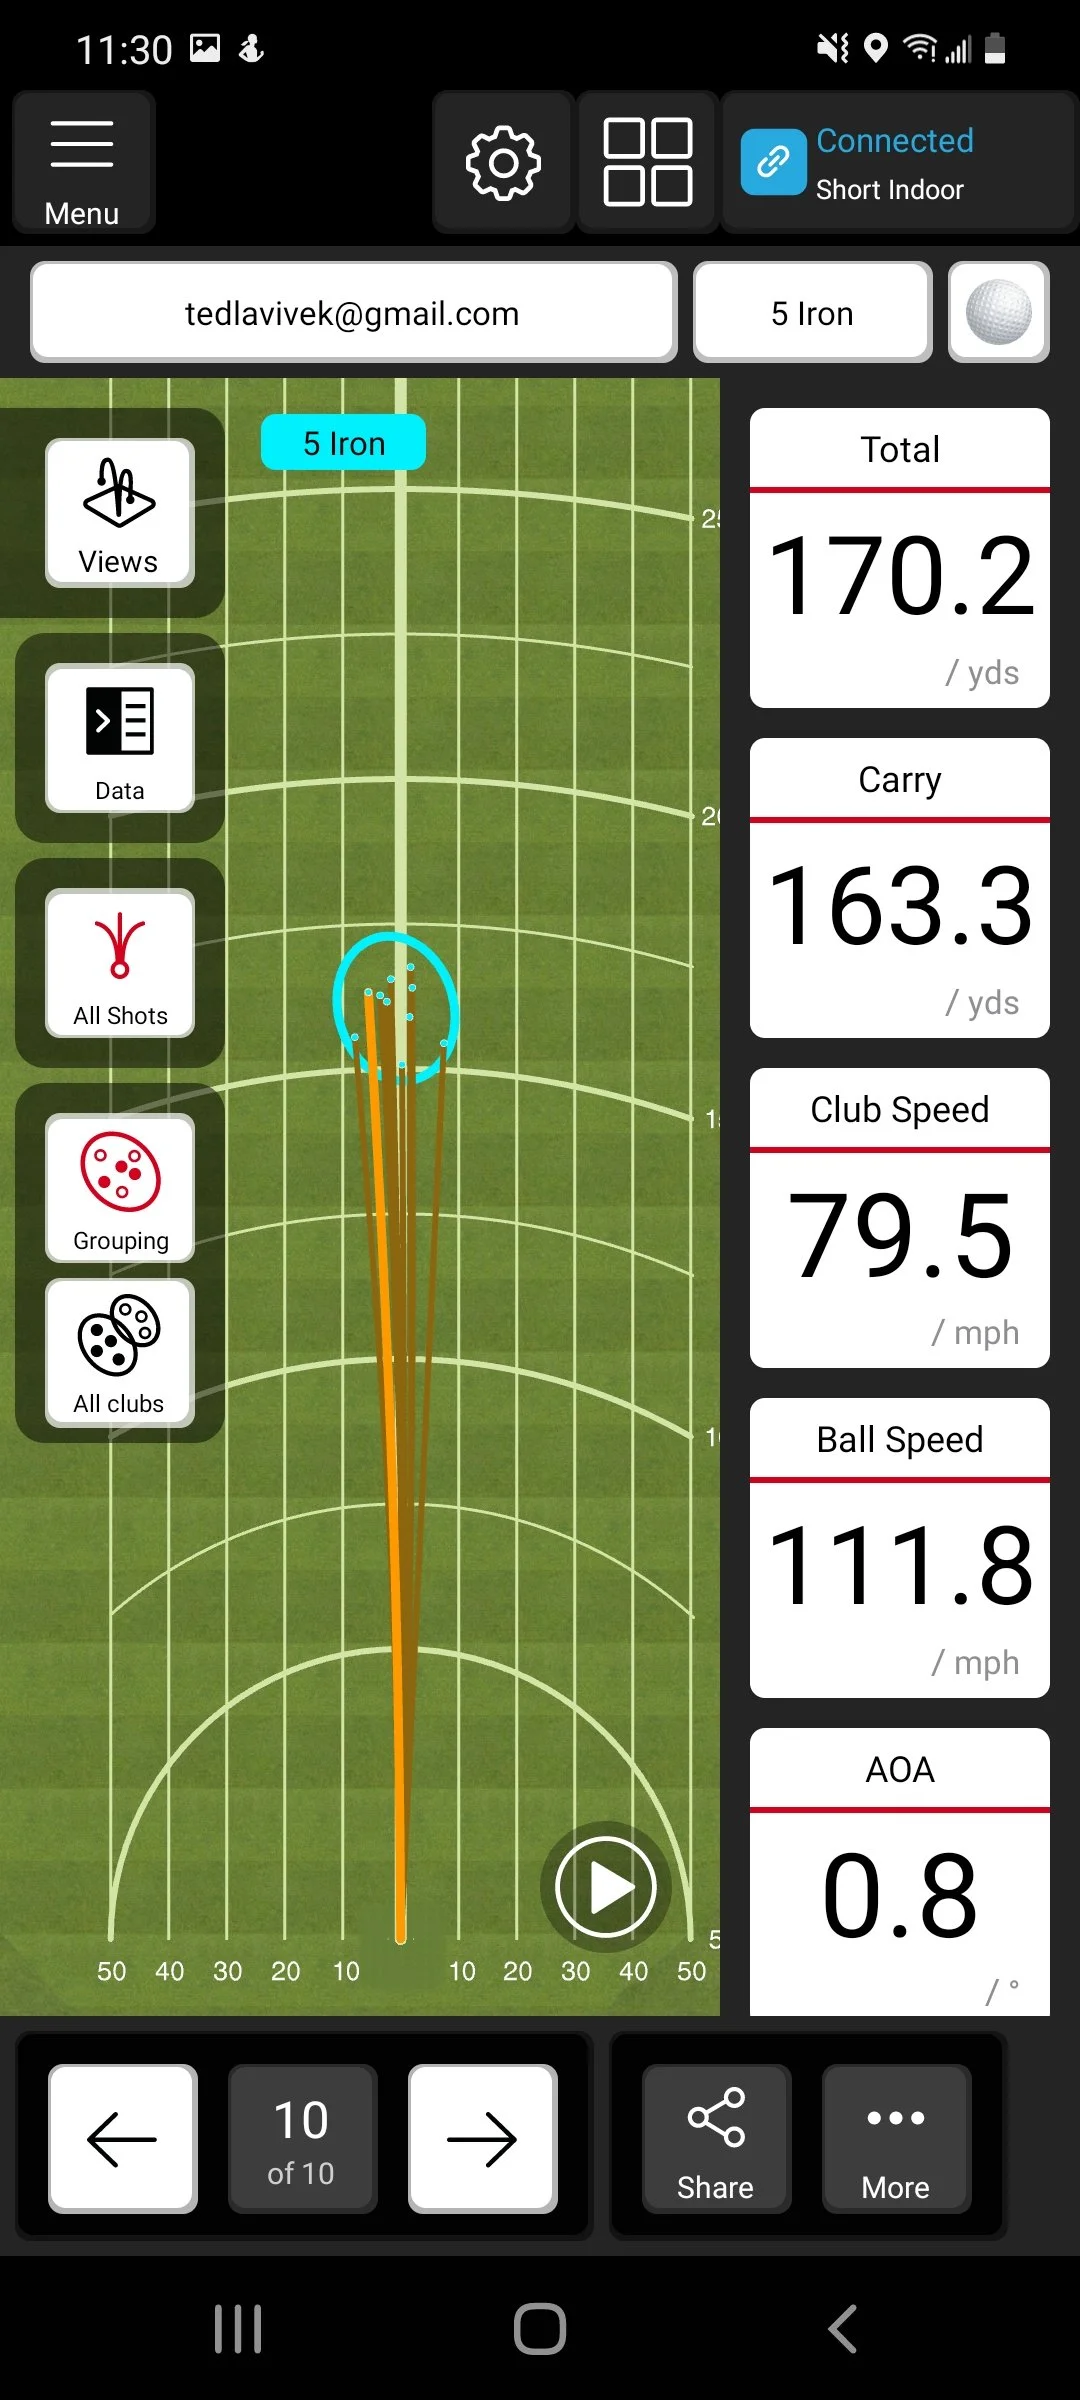
After having the simulator for about a month and playing for well over 50 hours on it, I can firmly attest that this is one of my best golf purchases to date. The ability to practice any time of day regardless of weather and get real time feedback has been amazing and I have already started to see some improvements in my game (screenshot of a recent training session).
The Simulator Build:
Space Needed: Need at least 16 feet of space for the simulator I chose. Each company has different specifications.
Simulator: FlightScope Mevo+ - $1,800 (Usually $1,999 but they often run seasonal sales so look out)
Golf Net: Rukket Sports SPDR Portable Driving Range $255 (Usually $319 but can find coupons online to save a few bucks)
Golf Mat: Rukket Sports sent over a hitting mat free with the net and I talked to my local municipal golf course and purchased a used stance mat for $25.
Extra Netting: The net I purchased was 10x7 which is more than enough for irons and woods, but to practice wedges and avoid hitting shots above netting I added additional netting above to ensure no balls pass. Fortunately I had extra netting from an old net but this would be ~$50 based on quick research.

Golf Course Simulation Software: E6 Annual Subscription - $300 Annually
Projector (Optional): I had one already at my home but these can run anywhere from $300 and up. If you want to save the money or don’t have one already, you can use any basic device (Phone, Tablet, & TV).
Projector Simulator Screen (Optional): Just used a white cloth I purchased from Jo-Anne Fabrics for $15
Total Out of Pocket Cost: ~$2,400


